Breakfast on the Go

Lately, I feel like I’ve been going 100 mph EVERYWHERE. Sometimes I feel like it’s 6 p.m. when I look at the clock and then a few seconds later it’s 8 p.m. There’s probably a name for this phenomenon, but whatever. Because I feel so rushed, sometimes I’ll let things slip (makeup, fixing my hair, ironing my shirt, etc.), but the one thing I refuse to skip is breakfast. Ask my mother what I was like as a child if I didn’t eat first thing in the morning. I’m sure she’ll agree I was a real peach. Better yet, ask my husband when we are on vacation and I eat an hour or so later than I normally do. Ha. (I swear I’m not a monster.) The point is, I just can’t skip breakfast. It causes nausea, headaches and just a general feeling of hangry.

So, while I was rushing around yesterday morning, I realized I had NOTHING to fix for breakfast that wouldn’t take 10 minutes. I was already “late”, so I didn’t have 10 minutes to spare. I grabbed a half pint mason jar, filled it halfway up with dry, rolled oats, added a tablespoon of agave syrup and bolted out the door. Once I was at work, I pulled out my container of strawberries, added a few slices to the jar and poured in some boiling water from our kettle. INSTANT OATS! I felt like such a dip for not realizing how easy that was and also got pretty excited when I realized I had a fun, new alternative to my newly discovered overnight oats.  I even added a little granola to it for some crunch. So good.

IMG_1561IMG_1562

In the spirit of trying to feed my body better foods, I finished the work day off with a big, veggie-filled salad. I was absolutely stuffed, which is something I usually never experience with salads.

IMG_1564

It feels good to be back on track or starting down a new road or…whatever I’m doing. 🙂

My Healthy Tip of the Day: One day per week, go veg. Even reducing your consumption of animal products one day per week can A) give you a better understanding of what veganism really is all about, B) help reduce the impact we humans have on our planet and C) help you discover new and exciting veg options to try out! My current fave is a simple snack of broccoli, cherry tomatoes and peppers dipped in Sabra spicy hummus!

My Stitch Fix Experience

A few months ago, I decided to give Stitch Fix a try. I’d read several positive reviews and started seeing a lot of posts about the service pop up in my social media news feeds. Every day people, JUST LIKE ME, were trying this service with a lot of success. I decided to sign up, paid the $20 styling fee and patiently waited for my first “fix” to arrive.

At first, I was…pretty underwhelmed, to be honest. I thought I’d receive five items I just couldn’t live without; however, I received five items that I just “kinda” liked. Since I’d already paid the $20 styling fee, I figured I’d keep the necklace. What the heck, right? It was a super cute long chain with little dangly things on the end. It went with practically everything in my closet and has surprisingly held up well.

IMG_0414

Here is one of the super cute necklaces I kept. 

The next month rolled around and it was like déjà vu. I kept another cute necklace (above) and sent the rest of the stuff back. I feel bad saying this, but I was actually too embarrassed to share any of the photos via social media of myself in the clothing, because I thought they were so unflattering on me. (You’ll see the long, gold necklace I did keep. I actually kept the dark blue shirt, too.)

So, yeah. I was pretty bummed. However, after I started adding stuff to a Pinterest board for my stylist to access, I noticed I was receiving pieces I was more eager to keep. For instance, in one shipment, I received the CUTEST blouse with elephants all over it and it is, to this day, one of my favorite shirts.

IMG_0717

The elephant shirt is in the center. Although, the striped J-Crew shirt to the left of it might be my second favorite.

With each shipment, I noticed more and more of “my style” coming through in the pieces. I didn’t expect miracles or anything, but I did hope to keep more than just one item each time. Fast forward to this month’s fix. Please cue the drum roll…I’m keeping EVERYTHING. That’s right. Everything. I cannot believe it, but this latest fix has completely blown me away. I mean, when I opened it up, I thought, “Wow this seems really ‘me’, but there’s no way it will all fit.” Oh, but it did.

Everything felt super comfortable and all of the pieces seemed like things I could easily fit into my wardrobe. I’m especially excited to wear the dress with a cute denim jacket and some flats this spring!

So, is Stitch Fix right for you? Well, I can’t make that decision for you, but what I can do is provide you with a few short facts that may help you decide whether or not to give their service a try.

  1. It brings custom-fitted clothing right to your door. This service really takes the work out of shopping, which is sometimes a huge relief. Ever head off for a nice, relaxing afternoon of shopping, only to be bombarded with crowds and pushy salespeople, defeated by bad dressing room lighting and left wandering around the food court in search of sugary redemption? Yeah, me too. Actually, what usually happens is I dare to step outside of the box, get home and realize I don’t know how to wear something. Thankfully, the next point addresses that very issue!
  2. The stylist provides you with dress and casual style examples for each of your items. (See the card in the image above.) I am someone that generally needs to be instructed on how to wear something. I’m getting better at thinking outside of the box (or maybe I am starting to care less about how my style is perceived), but I still have moments when I’m not sure if I need to pair my skinny jeans with riding boots or simple ankle booties. It’s a lot of work being a woman, but thankfully, my stylist tells me exactly how to dress my pieces.
  3. You basically customize everything. That sounded more vague than I intended, but that’s because you can, quite literally, customize every part of your styling experience. This service allows you to set your sizing for every item of clothing you can think of. Dresses, shirts, blouses, jeans, skirts, etc. It also allows you to set price ranges for each, which I think is really nice. It also offers you visual options for your style. Say you can’t quite pinpoint what your go-to style is. Stitch Fix will offer a series of outfit images that you can select as some of the styles you like to sport. It’s really neat!
  4. If you don’t like anything, you simply send it back. I like this service, because there are times when I really only find one item in each fix that I like, so I just send the rest of the stuff back through the mail. Plus, your $20 styling fee goes toward any purchase!
  5. If you do like everything, you get a discount! It isn’t much, but if you want to keep your entire fix, you receive a 25% discount, plus the $20 is deducted from your final price. Plus, the clothes are high quality, so you don’t have to worry about them wearing out.

Ok, I’ve pitched this enough. Go visit their site, look them up on Pinterest and see if this service is something worth trying. Remember, you can always cancel your subscription if you get tired of it!

My Healthy Tip of the Day: Dress for comfort! In college, I used to try to pour myself into tight jeans and jam my feet into way too high heels, but now, I go for a comfy chic look. I’ve traded in my pumps for wedges, discovered my deep, passionate love of stretch jeans, and found that a blazer can dress just about anything up. Ok, this is more of a fashion tip, but whatevs.


Garlic Chicken Stir Fry

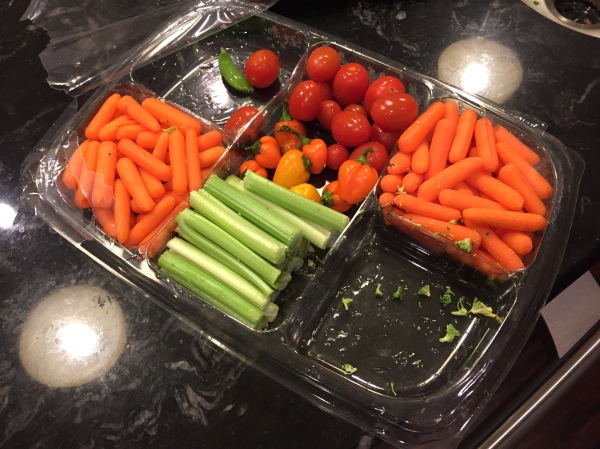
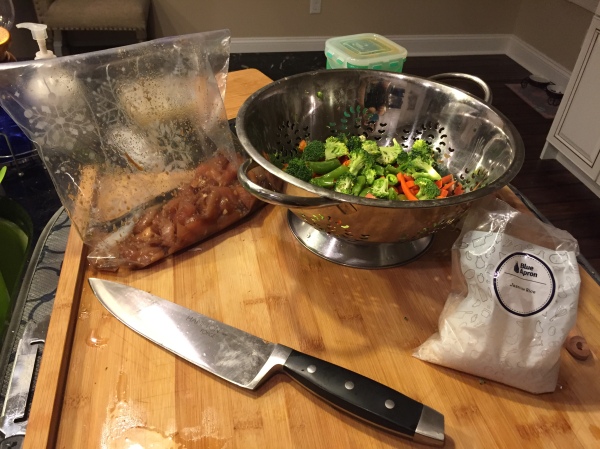
Well, it’s nearly the end of 2015 and I still can’t believe how fast this year has gone by. I feel like I say that every year, but it does seem to be true that the years just go by a little faster every time. Anyway, a few nights ago, hell-bent on cooking something new for dinner, I decided to give a classic recipe (and a personal favorite) a try. It was one of those “oh crap, I don’t have anything in the house to cook” kind of meals, so I had to improvise. I found a leftover veggie tray, some frozen chicken pieces tenders and a leftover bag of Blue Apron jasmine rice. I was SET!

IMG_0639 2IMG_0640IMG_0641

I was pretty surprised how quickly the whole recipe came together, considering I travel at a snail speed when trying out a new meal. I just always worry that I’m going to miss a step or just get overly confident and wreck the whole thing. I actually pulled this recipe from my Better Homes and Garden New Cook Book that my mother-in-law got me for Christmas a few years ago. If you don’t have one of these, I highly recommend investing in one. It has recipes, kitchen and dining tips, including place settings and even basic etiquette! It’s a real treasure trove.

As you can see, I used carrots, broccoli, some of those baby pepper things, sliced yellow onion and snap peas. The best part of the stir fry was actually the snap peas, because they got all of the good marinade down inside of the pods. YUM! Anyway, here is the recipe. Obviously you can use whatever veggies you want, but I’ve found that broccoli and carrots are sort of my staple. Enjoy and happy cooking!

IMG_0642 2

Garlic Chicken Stir-Fry

Ingredients

  • 1 cup water
  • 3 tablespoons reduced-sodium soy sauce
  • 1 tablespoon cornstarch
  • 2 tablespoons cooking oil
  • 1/2 cup sliced water chestnuts
  • 2  cups hot cooked white, jasmine, or basmati rice

Directions

  1. Cut chicken into 1/2-inch pieces. Place chicken in a resealable plastic bag set in a shallow dish. For marinade, stir together water, soy sauce, and vinegar. Pour over chicken; seal bag. Marinate in the refrigerator for 30 minutes. Drain chicken, reserving the marinade. Stir cornstarch into reserved marinade; set aside.
  2. Pour oil into a wok or large skillet. (If necessary, add more oil during cooking.) Heat over medium-high heat. Add green onion, mushrooms, and garlic to wok; cook and stir for 1 to 2 minutes or until tender. Remove vegetables from wok.
  3. Add chicken to wok; cook and stir for 2 to 3 minutes or until no longer pink. Push chicken from center of wok. Stir marinade mixture; add to center of wok. Cook and stir until thickened and bubbly. Return cooked vegetables to wok. Add water chestnuts. Cook and stir about 1 minute more or until heated through. Serve with rice. Makes 4 servings.

Recipe credit: BHG http://www.bhg.com/recipe/chicken/garlic-chicken-stir-fry/


Hey Bruh!

Hi everyone! Long time no blog!

To say a lot has happened since I last posted would be an understatement. The biggest change certainly has been the newest addition to the Miller household. Here’s a hint…my coffee just got a whole lot more hairy!

IMG_9468

Little baby Brady was only seven weeks when we found him hanging out behind the gas station near our house. We tried and tried to catch him, but he was simply too wild. Just when I’d thought he had disappeared, I spotted him run behind the ice machine outside of the gas station. It took a can of tuna, a broom and a whole lotta dust and dirt, but it was well worth it. (You can see him wedged behind the machine in the top left pic of the collage.) He was so tiny and so, so dirty, but I got him all cleaned up and set up a little room for him at our house.

IMG_9472

This was taken at the vet, the day after we found him. He was so tiny! Seven weeks is too little to be roaming the streets.

IMG_9769

After a de-fleaing and de-worming period (about four weeks), we decided it was time to introduce him to our girls. Shockingly, it all went well. There was a little hissing and slapping, but now they all coexist just fine (within a healthy distance of each other). Well, sort of.

IMG_0067

They always form a triangle. I’m always suspicious.

You see, Grace has established herself as the alpha cat. She basically bullies Brady at any opportunity, but in a cute, playful way. Trust me, it’s not malicious or I wouldn’t be so casual about it. As a result, Brady has decided to assert his dominance over Karen, because, well, she’s old. He mostly just annoys her, but sometimes we like to stick him in another room to give her a break from his “playing” ways.

IMG_0047

The girls taking a break in the basement.

Now, Brady is 15 weeks old (until he’s six months, it’s just easier to measure age this way) and is well on his way to becoming an enormous cat. He still loves to sit on our backs, but has hit a bit of an ornery patch. He’s what we in the cat world like to call a “Devil Cat”. Seriously, Satan himself would bow down to this feisty little monster. All joking aside, Brady is a wonderful and very unexpected addition to our family unit and we constantly remind ourselves that we’ll miss these kitten days!

IMG_0026

Just a couple of bros. He’s 15 weeks in this picture and is far from done growing.

On to some other exciting news. I’m back to running full time again! As I mentioned in a previous post, I had to basically start from scratch due to my hips being out of alignment. I put in my time at the chiropractor, and finished up my six week stint with the instructions to only run for five to ten minutes each time I hit the trail. The rest of the time was to be spent walking and adjusting my stride to it’s correct alignment. It was maddening to watch Alex get to take off for 30 minutes, while I was poking around behind him for the remaining 20. However, with patience and endurance, I have worked my way up to running 3.1 miles again! I feel great and I actually look forward to lacing up again. My pain is minimal, but not without a little maintenance. I try to use my resistance band to stretch out at least three times per week. If I start to notice any tightness, I just roll out my yoga mat in my cube at work and stretch it out. Sitting at a desk all day long plays a huge role in my tightness, so a few hip flexor and glute exercises a day can really alleviate that. In addition to stretching and wearing my orthotic inserts, I also decided to switch back to the more supportive style of Brooks running shoes: Adrenaline GTS.

IMG_9886

I actually got these at http://www.6pm.com for about $30 less than I would have paid on their website. (Not saying that’s the way to go…but seriously, check out 6pm for great deals!) These have awesome support and have really grippy soles, which are perfect for trail running. These shoes have totally saved my back!

Well, I think that’s all for today. I’ll leave you with a link to the page I visit quite often when I need to open up my hips and stretch my flexors. Oh and PS, PopSugar is an amazing site that you need to start visiting immediately. Try out some of these moves today! http://www.popsugar.com/fitness/Basic-Stretches-Tight-Hips-3130483#photo-3130483

Salad with a Side of Salad

Why, hello there.

Last week was a pretty decent week for my revamped healthy eating lifestyle. Since, well, moving into our house, my eating habits have been awful. (We moved in almost a year ago.) I’m not sure what the cause, but I’ve known for a while that things need to change.

The funny thing about eating healthy and exercising, is that it’s actually fun to me. I used to relish my Saturday afternoon meal planning sessions, even if it was just an excuse to sit on Pinterest for hours. I used to love that satisfaction of finishing a day under my caloric goal. Heck, I used to even enjoy the idea of hopping on an elliptical, just because it meant I could actually set aside some time for a podcast. However, moving in to my permanent fixture made me a bit…lazy. It was suddenly too easy to just come home, order take out and hit the couch. It was far too much effort to actually lace up my running shoes and head back out for a workout. Plus, for the first time in my adult life, I am without a gym. Sure, we have the treadmill in the basement, but I loathe it! I detest it! It’s honestly a torture device to me! Finally, the best part of eating healthy and exercising was being able to talk about it on Cat Hair in my Coffee. It gave me something to work toward, besides actual work.

Did you enjoy that derailment, because I sure did.

Last week, I made the effort to get up every morning and make breakfast, throwback style. I made two eggs, over-easy with two pieces of turkey bacon. I decided to skip the English muffin to see if I would miss it, and the good news — I didn’t! In fact, I found myself staying fuller longer throughout the day. Amazing.

IMG_9109

Another meal I was particularly proud of was my Caprese salad with a side of salad. I’m obsessed with mozzarella, tomato and basil, so I’ve been trying to incorporate some combination of those flavors into as many meals as possible. This particular one was just a classic serving of Caprese salad with toasted baguette pieces. Since I had a ton of lettuce/salad mix from Round Right Farm, I decided to make a big salad to along with it. I wanted a creamy dressing, so I opted for this amazing creamy avocado dressing recipe I found on Pinterest. The recipe can be found below:

INGREDIENTS

  • 1 ripe avocado
  • 1/2 cup white wine vinegar
  • Juice of one lemon
  • Salt and pepper, to taste
  • 3/4 cup extra virgin olive oil

INSTRUCTIONS

NOTE: Some people have said that this recipe is way too tart for their tastes. I’ve made it quite a few times (it’s a summer staple for us!) and still love it, but if you aren’t a big fan of tang, try reducing the vinegar to 1/3 cup and use only half a lemon.

  1. In a food processor, combine avocado, vinegar, lemon juice, salt and pepper. Run processor until very smooth and creamy.
  2. With processor running on low, stream in olive oil through the shoot until just combined.

I personally used my Magic Bullet for the blending and it turned out great! I liked the tartness of this dressing and thought it really went well with the feta cheese I sprinkled on top.

IMG_9106

So there you have it. My “A for Effort” meal. This week, I’m expecting a Blue Apron delivery, so I’ll be back in the kitchen for that.

My Healthy Tip of the Day: Making drastic changes too quickly is a recipe for disaster when trying to maintain or work towards a more healthy lifestyle. Stick with small, gradual changes. For example, instead of buying a store bought dressing that is often filled with preservatives, find a recipe on Pinterest or another recipe site and take a crack at making your own. I found this amazing cheat sheet that might help with this!
diysaladdressing

French Women Don’t Get Fat

Hiya!

Though it’s been a while since I’ve shared anything, Cat Hair in my Coffee has definitely been on my mind. In fact, over the past several months, not posting on here has helped me realize something: my posts gave me something to work toward each week. If I wanted content, I had to do something. I had to try a new workout, a new recipe, a new TV series to binge preventing me from moving from the couch! So, over the past few weeks, I’ve been getting back into the habit of documenting my meals and trying to better plan my activities so I could make this, my beloved blog, a part of my routine again. Without further adieu…

A few years ago, while Alex and I were in Mason, Ohio, at the Cincinnati Tennis Tournament, we decided to take an afternoon and tour the town. While not an exceptionally large town, Mason certainly has no shortage of great shopping and dining! We poked our heads in a great little discount bookstore and proceeded to fill our arms to the brim with our selection. One of my great finds was a cookbook titled “French Women Don’t Get Fat” by Mireille Guiliano. I believe I paid $2.75 for it and maybe flipped through it twice over the years. After all, how many ways can one serve leeks?

Last week, I decided to bust out ol’ Mireille’s cookbook and give a few recipes a try. In her book, she puts a lot of emphasis on how French cuisine contains little sugar and few ingredients, cutting down on a lot of the unnecessary garbage that we put in American food. She begins each chapter with a little bit about herself and the French culture. The first recipe I wanted to tackle was very basic. A simple ratatouille would be a great replacement to our usual take-out lunch on Saturday, I thought! So, I got busy chopping and dicing, but took several liberties with my version. (I had some CSA veggies looking so sad in my fridge, so I had to throw some of them in!) A traditional ratatouille recipe contains eggplant, zucchini/squash and tomatoes. The nice thing about this recipe is that no stock is needed; the vegetables create their own broth when cooked down. Here is my version of the super traditional and Pixar-inspired Ratatouille.

  • 1 large zucchini, cut into 1/2 inch pieces
  • 3 Roma tomatoes, cut into 1/2 inch pieces
  • 5 fingerling potatoes, cut into 1/4 inch pieces
  • 1/2 cup of Swiss chard, chopped (from Round Right Farm)
  • 5 garlic scapes, diced (from Round Right Farm)
  • Olive oil, for coating the pot
  • Salt and pepper

IMG_9026

  1. Prepare the vegetables and set aside. Add the olive oil and garlic scapes and turn on medium to high heat. Lower the heat to medium-low after about 2 minutes.
  2. Add vegetables to pot and stir to coat veggies in the garlic oil mixture. Add a hearty dose of salt and pepper and let cook, covered on low heat, for about 1 hour. Serve with crusty bread and a sprinkle of Parmesan cheese!

IMG_9032

I feel like this is one of those healthy and extremely easy recipes that you can have on hand that feels semi-fancy. I also like how versatile it is. Don’t have eggplant? Sub in whatever veggies you have on hand!

The next recipe I decided to try out was one for Madeleines. Mireille’s recipe is actually for a chocolate version of these classic French cookies and required minimal effort to bake. I didn’t have the adorable little shell molds that typically give Madeleine cookies their cute shape, so mine were simply round. Unfortunately, I ended up eating more dark chocolate while baking than I actually enjoyed the cookies fresh out of the oven. I digress.
IMG_9031

For more of Mireille’s recipes, check out her website, or pick up a copy of her book! I promise, it won’t disappoint.

PS: I’ll be sure to add my ratatouille recipe to the dinner section of my recipe tab.

My Healthy Choice of the Day: I brought my Brooks PureFlow shoes to work and actually put my orthopedic inserts in! BONUS: I actually walked in them for 20 minutes! I’m taking baby steps toward fixing my spinal alignment. Thanks Advantage Health and Wellness!

Skin Care

Hi everyone! I hope your new year is starting off with lots of happiness and motivation toward all of your goals! I know mine is going well so far. I wanted to bring up something that I’ve been a little obsessed about for the last few months: skin care. Before I got married back in October, I decided I wanted to try a new makeup. I had heard great things about Bare Minerals, so while I was at the South Hills mall in Pittsburgh, I stopped in their store. One of the employees immediately got to work on choosing the right combination of products for my skin. After she walked me through how to apply each product, I felt confident with my new face. I am now a HUGE Bare Minerals advocate.

Within a few weeks, I noticed my skin had really started to clear up. I had fewer bumps and my breakouts had reduced greatly. However, because of the nature of the powder makeup, I had started noticing a few other things about my skin that I just didn’t like. For example, from years of raising my eyebrows, I spotted two fairly deep lines on my forehead. Now, most people wouldn’t have noticed them, but every time I looked in the mirror, it was all I could see. If I had been in my 30s, I would have called this natural aging, but considering I’m only 26, this alarmed me. I also noticed that my pores had only started getting bigger. Again, something that I know is from aging, but shouldn’t be happening so rapidly. So, instead of rushing out to purchase a ton of products, I waited until my regularly scheduled dermatologist appointment to bring all of these issues up.

After meeting with my doctor, she and I both determined that an anti-aging skin care routine would be the best thing for someone of my age. The first thing she pointed out was the importance of moisturizing. Being someone with fairly oily skin, I had avoided lotions like the plague. She told me that this was actually counterintuitive, because a dry face would actually trigger my body to produce more oils to compensate. The second thing she recommended was a glycolic acid cream. This is the same stuff that is used for chemical peels; however, she provided me with a very low dose. She said as I age, I can gradually start moving up in strength. Glycolic acid is used to improve the skin’s appearance and texture, by reducing wrinkles, acne scarring, hyper-pigmentation and can help improve many other skin conditions. Basically, it works to exfoliate the skin, stripping away the dead, damaged layer to expose the new, young layer below. The third thing she provided me was a prescription for a retinoid cream. The retinoid cream works to clean out and shrink my pores, as well as clears acne. All of these things together create a more smooth, line-free, acne-free face. Honestly, my face has never been softer!

The bad news is that it takes about 10-12 weeks to really see improvements, but the good news is that it is so worth it to see new and beautiful skin! The glycolic acid does cause peeling, but a good moisturizer will help battle the flakes. My derm actually told me that if peeling and dryness doesn’t occur, the cream strength is too weak. By coupling all of these creams with a great SPF, I not only have baby skin back, but I am protecting myself for years to come. Below you’ll find my total skin care routine. It may seem like a lot, but your skin will thank you down the road. Deep forehead lines are usually hard to correct without the aid of Botox or surgery, so start protecting yourself now and avoid the frustration later in life. IMG_7657

If you can’t already tell, I’m a HUGE Neutrogena fan. I just find their products work best on my skin. So, when I wake up, I like to wash my face with the Ultra Gentle foaming formula. This just makes my skin feel refreshed and helps with the oil my face produces throughout the night. After that, I apply a thin layer of the glycolic acid cream. This cream does sting a little, so I usually like to apply it on and then go make a cup of coffee or something to allow time for it to settle in. After that, I apply Pond’s moisturizer to my neck and face. Never forget your neck! Finally, before I start my makeup routine, I put on my Elta MD sunscreen. I’ve also used Neutrogena’s sunscreen products and highly recommend them.

After the day is done, it’s time to strip all of that makeup off my face. I’ll start with removing my eye makeup with my Neutrogena Naturals wipes. I’ll usually try to remove as much makeup as possible with one wipe before I gently wash my face with the Ulra Gentle foaming formula again. Sometimes I notice that my pores are just looking large, so I’ll opt to swipe on some of the Pore Refining solution. Finally, I finish the night with the Adalapene Gel .3%, using only a pea-sized amount. Honestly, once I got into the habit of using these products, I realized it didn’t take up much of my routine as I initially thought it would. My final skin care habit is staying out of the sun as much as possible.

Well, there you have it. I hope you find some of these products as useful and effective as I did. Did I mention those two lines on my forehead are now gone? That’s right. GONE. 🙂

Good luck with your skin care routine and have a fabulous weekend!

List of the Bare Minerals products I use.

Cooking Away

Well, it’s been a few weeks since I started using the Blue Apron service. So far, I’ve found it to be a really fun way to get comfortable in the kitchen. I was always a standard lasagna, chicken tacos and soup/sandwich kind of girl, but now I’m making dishes like these!

IMG_7241

Flank steaks and creamed kale with sunchokes

IMG_7246

Seared hake with melted leeks and fingerling potatoes

IMG_7306

Pan-seared salmon with cranberry and walnut stuffing

Oh, and it’s totally true what they say about white plates — they do make everything look more beautiful! Anyway, The dishes above were a few of my favorites to make and definitely favorite to eat. I never realized toasted sunflowers and kale could go so wonderfully together! Also, leeks in a tin foil bag with potatoes might be my new go-to. The leeks had such a mild flavor and really complimented the light hake.

In other news, we’ve finally started putting together our last few rooms of the house. I think when anyone moves into a new house from an apartment/condo, they just fill what they can and let the rest come later. That’s exactly what we did. One of our spare rooms still needs some major work before it’s magically transformed into an office, but the entryway room is now on it’s way to being complete.

IMG_7315

Karen’s favorite spot! (We were trying to flatten the rug — hence, the boxes.)

After a lot of consideration, we decided against making this room a dining room. It just didn’t feel natural to us and we didn’t see ourselves ever using it. A sitting area with a big, comfy rug? Now that we will use! Oh and that mirror you see off to the right only cost me $25 at TJ Maxx. That will, hopefully, be used for this Pinterest idea.

Umbrella stand + coat rack | Dream Green DIY

I love the idea of pictures surrounding the mirror!

I love the idea of putting a little table in the entryway for dropping keys, pocket change, etc. Plus, it gives you the opportunity to do one last hair check before dashing out the door.

Well, that’s it for me. I’m off to pretend I’m finally going to start that 30-day lunge challenge, when I know I’m really just going to go eat and loaf on the couch. I’ll leave you with one of my favorite Brady moments. You’ll see it ties in to this post, because…well, there is cooking involved.


Blue Apron

IMG_7142

A month or so ago, I heard about this cool food service called Blue Apron. I did some investigating, got a first-hand account of the process and decided it would be something fun to do this winter. This is how it works.

You sign up for the service and provide your general food preferences — fish, beef, vegetarian, etc. Then, the chef’s at Blue Apron sort out the recipes catered to your dietary preference. All of the ingredients for each dish (three meals per week)are shipped in a refrigerated box, along with the detailed recipe cards. That’s it! The ingredients are always fresh and the chefs try to choose meals that incorporate seasonal ingredients. Each meal ranges from 500-700 calories, per serving, but you can easily divide that up for smaller portions. This service is basically for someone who likes to cook, but ends up wasting ingredients. The plans are very flexible and allow you to skip weeks if you don’t have time to prepare the meals. The plans offered are $59.94/week for two people or $119.88/week for four people. Depending on when you sign up, you can expect your first delivery within two weeks. So cool!

IMG_7143IMG_7144

On Friday, I received this box with ingredients for the following amazing recipes.

IMG_7145

-Moussaka-Style Lasagna
-Pan-Roasted Chicken
-Crispy Fish Sandwiches

Tonight, I’m preparing the chicken and I can’t wait to see how it turns out!

Mr. & Mrs.

Hi everyone!

For the few of you who are still left reading my sporadically updated blog, I’d like to share some news. Alex Miller and I finally tied the knot. On October 4, 2014, we said “I do” at the Chebeague Island Inn in Maine! The ceremony was very intimate and lasted about 5-7 minutes. It was perfect! I’d gush about how two souls became one and all of that jazz, but I’d rather not make anyone sick. So instead I’ll share a recap of our trip!

The Millers Do (Did) Maine!

We decided to drive to our wedding destination, which was a decision that was carefully thought out and considered. In fact, a PowerPoint was presented to the future groom informing him of our travel options. Once we nailed down the method of travel, we had to map out our route. My dear friend Abigail, who lives in Worcester and attends Clark University, advised us against any routes that would take us through or even close to New York City. (Spoiler alert: after a very unsuccessful trip “to” Boston, we figured out pretty quickly that driving in any city larger than D.C. or Pittsburgh is probably a mistake for us.) We chose the route that would take us through Scranton, Pa. (yay Office destination) and would only cost us about 30 extra minutes.

IMG_6751

Passing through Bedford, Pa.

We split the drive up into two chunks. The first was from Morgantown to Scranton and the second was on to Portland, where we filed for our marriage license. The drive to Scranton was picturesque! We took a lovely drive through Bedford, Pa., en route to our destination and took in every single sight of the leaves changing. Once it became dark, the trip became much less about adventure and more about finding a darn town. We knew we were close to Scranton, but what we failed to realize was that most of the state of Pennsylvania up to that point had forgotten to turn on the lights. We could barely see the road at times! After we made it to the Electric City, we got settled in and rested up for day two of traveling.

IMG_6760

The next morning, we headed out. I got a little anxious when my officiant called to report “weird” weather in the Portland area. She informed me that it had been drizzly most of the day, but that you could never really tell what the weather was going to do in that state. Ok, fair enough, but what she didn’t realize was that we were more interested in a chilly, autumn wedding day.

We drove through about a million tolls that second day, until we finally hit the straight stretch from New Hampshire to Portland. The crossing moose signs started popping up and I knew we were in heaven. Once we reached Portland, we were ready to put our house on the market and send for the cats. We instantly fell in love with the place! It reminded us of a mix of Morgantown and Pittsburgh, but much cleaner and with much friendlier people (friendlier than Pittsburgh — people in Morgantown are actually pretty pleasant). We headed over to City Hall to file for the license and then had a delicious dinner at a place called Timber.

IMG_6765

Wasabi peas!!!

IMG_6766 IMG_6767 IMG_6771

My dish combined vanilla and garlic with seafood. At first I was skeptical, but then, after a few bites, I was in heaven! Alex got some kind of cowboy steak, which was pretty out of this world. We stuffed ourselves to the brim. Shortly after finishing our dinner, we got word that Alex’s sister would be heading to meet us so we could all ride to the ferry together. We took off and just barely caught the shuttle to the ferry site. Water travel definitely took some getting used to! We arrived at the Chebeague Island Inn that night and settled in for the weekend of fun!

The next day, we were able to explore the island a bit. Boy oh boy was it gorgeous. During their “off” season, only 300 people reside on the island. That’s a huge difference compared to their 3,000 summer population!

IMG_6777

The beautiful Chebeague Island Inn.

IMG_6773 IMG_6774 IMG_6776

IMG_6782


After realizing that we were going to freeze our pants off, we decided to head inland to buy some warmer clothes. We met my parents at the shuttle site and headed to the fabulous Freeport, AKA, the shopping mecca. I’ll fast forward to the good stuff.

10688094_10102614736638869_5381622552451821739_o

We had a fabulous ring bearer! 😀

We got married! Woohoo! On Saturday, October 4, 2014, we said “I do” on the porch of the inn. So fun. After that was just a lot of champagne, food and enjoying each others’ company. The next day we all headed off in different directions. Most headed home, but Alex and I headed north, towards Bar Harbor.

IMG_6863

It was night time when we arrived, but we could tell just from our brief lap around the main street that we were going to love this place. We were so right. We spent the entire day walking around the town and then driving through the Acadia National Park. So fun!

IMG_6866

I ate every bite.

IMG_6922

The amazing view from our room in Bar Harbor!

IMG_6914

Ok, so after we left there, we headed to Salem, Mass. We were sooo excited to go during October, because we had read that the entire town is just one big Halloween party the entire month. They weren’t kidding. We decided to stay at the haunted Hawthorne Hotel, which was pretty centrally located to everything in town. In Salem, we visited a witch museum, stopped at a local witch shop, toured the House of Seven Gables, walked past a million old buildings (the first established Episcopal church in U.S., the Witch House), walked through the graveyard where Giles Corey was pressed to death, and made a sad attempt to go visit Gallows Hill, which we later found no longer exists.

IMG_6965

Hawthorne Hotel had only two haunted rooms, but we definitely felt a creepy vibe in the hallways!

IMG_6967

This is where Gallows Hill used to sit. Apparently the town just wanted to forget this awful period in it’s history and decided to build a park for the community.

IMG_6962

“The Witch House” was home to the judge, Jonathan Corwin, who prosecuted the accused witches.

IMG_6948

The House of the Seven Gables tour was really fun!

IMG_6938

Tombstones back then were so creepy.

IMG_6934

The Old Burying Point Cemetery is over 400 years old!

IMG_6931

We didn’t have a chance to tour this museum, but it looked really interesting. Definitely going back next year!

IMG_6960 IMG_6958 IMG_6947

After Salem, we headed west to Hartford, Conn. There we stayed the final night of a our vacation. I didn’t get to do anything Gilmore Girls themed, but I now have a great plan for our next trip to NE!

We arrived home to find very happy cats. Apparently the grouchies missed us! We took our time getting settled in and then immediately decided we were going back as soon as we were able. Yes, the Millers LOVE New England. We highly recommend a trip like this to anyone interested in our country’s rich history. You honestly can’t turn a corner in any of the towns without running smack-dab into some historic landmark.